VPC Network, Public and Private Subnets, Grant Subnets Access to the Internet (AWS)


Demonstrating how to create a Virtual Private Cloud (VPC) network, assigning IPv4 Classless Inter-Domain Routing (CIDR) block to the network, create public and private subnets, and ensuring that each subnet can access the internet.
Prerequisites:
- Knowledge of VPC network and how it differs from private cloud
- Knowledge of IP addressing and Subnetting
- An AWS account
Create a VPC network
We have to bear in mind that the VPC network will have an IPv4 CIDR block attached to it, let's try to get that first. I'll assume you already understand what an IP address is all about, so let's get down to business. For this network, I will be using a class A IP address with the structure below:
Class A (0-127): Network.Node.Node.Node
Class B (128-191): Network.Network.Node.Node
Class C (192-223): Network.Network.Network.Node
For example, a VPC IPv4 CIDR is 10.120.0.0/20, then a breakdown of this CIDR notation is given below:
subnets = 11111111.11111111.11110000.00000000 (in binary)
available bits are 20 bits, 2^20 = 1048576 possible subnetworks
hosts = 00000000.00000000.00001111.11111111 (in binary)
available bits are 12 bits, 2^12 = 4096 possible IP addresses
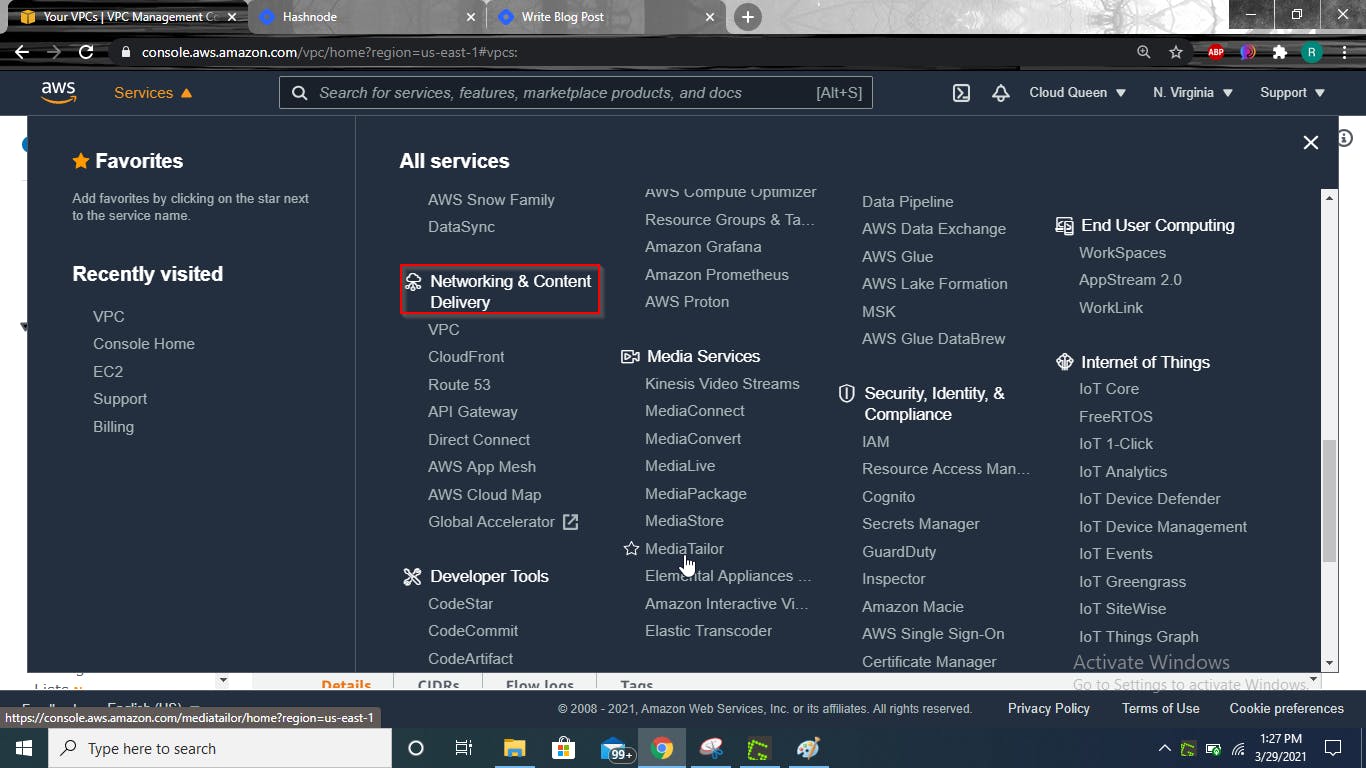
We have to identify the start range of this IPv4 CIDR block, where the starting range is 10.120.0.0 and the ending range is 10.120.15.255. Now, to create the VPC network on AWS, after signing in to AWS management console, o to Services, click on the dropdown menu > Networking & Content Delivery, select VPC.
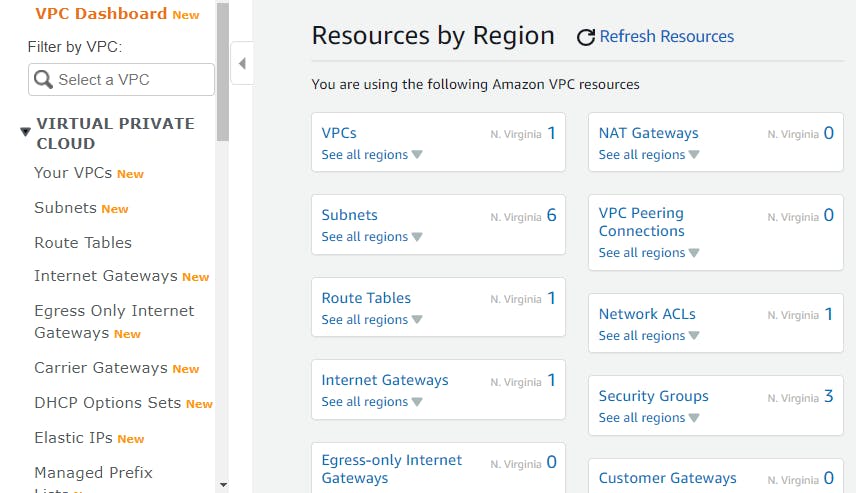
On the VPC Dashboard, select Your VPCs, located on the left side of the screen. The right shows a summary of the services running VPC.
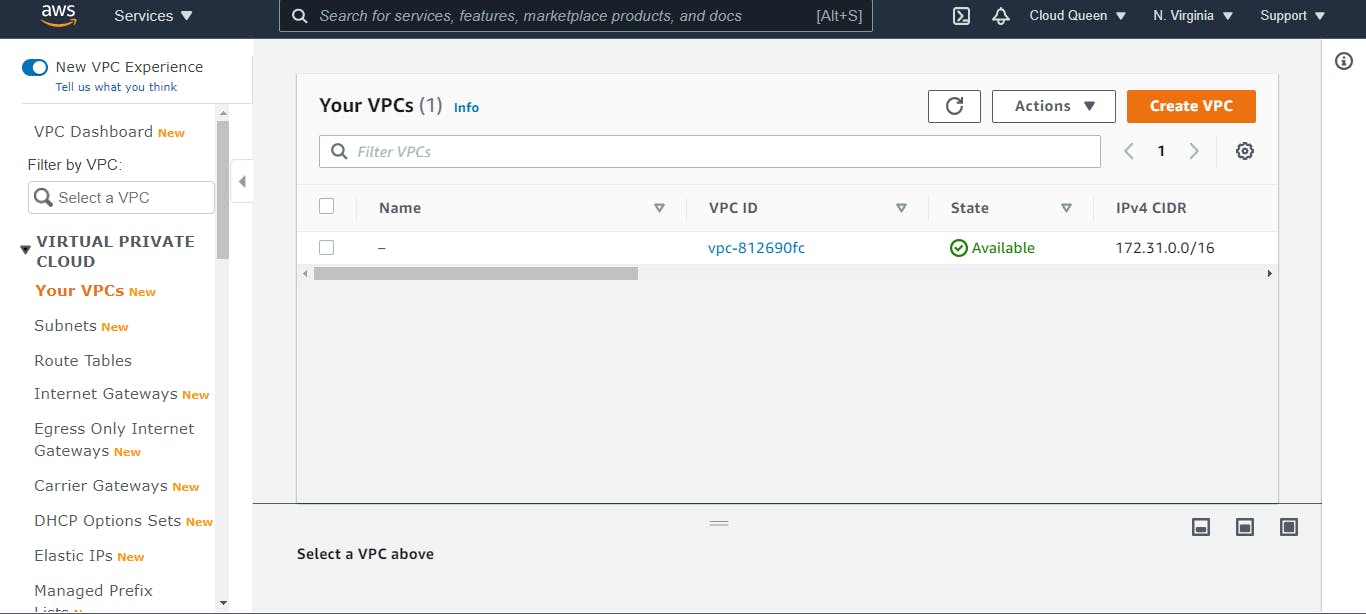
You will notice that there is a VPC network already created, it is created by default the moment you create an AWS account. Select Create VPC.
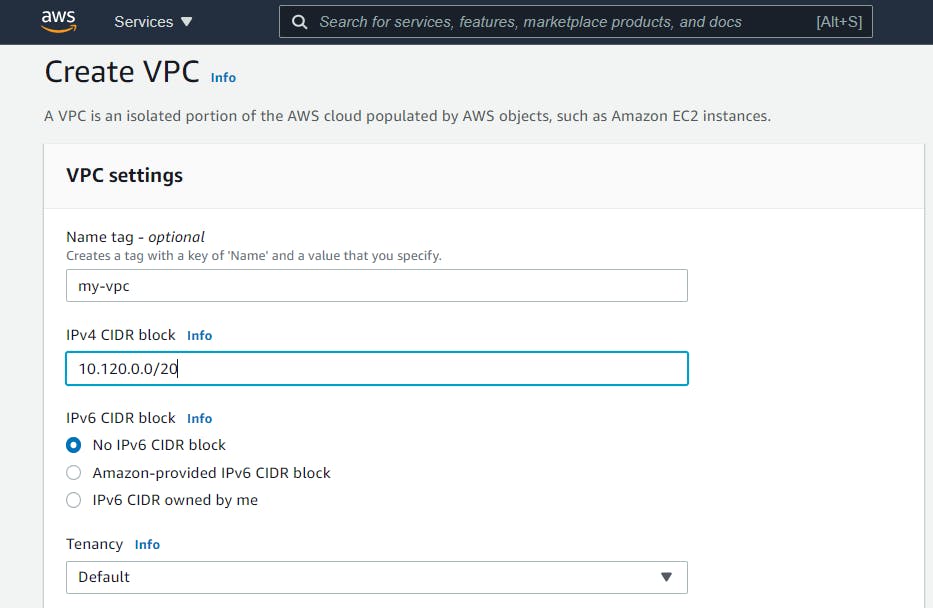
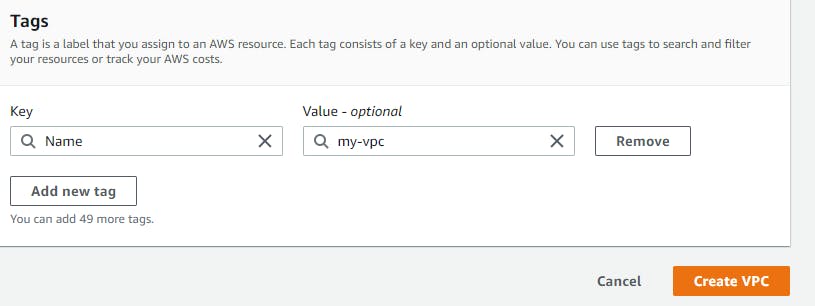
Give a name tag my-vpc, enter the IPv4 CIDR block, in this case, I'll be using 10.120.0.0/20. Leave the rest as default and select the Create VPC button.
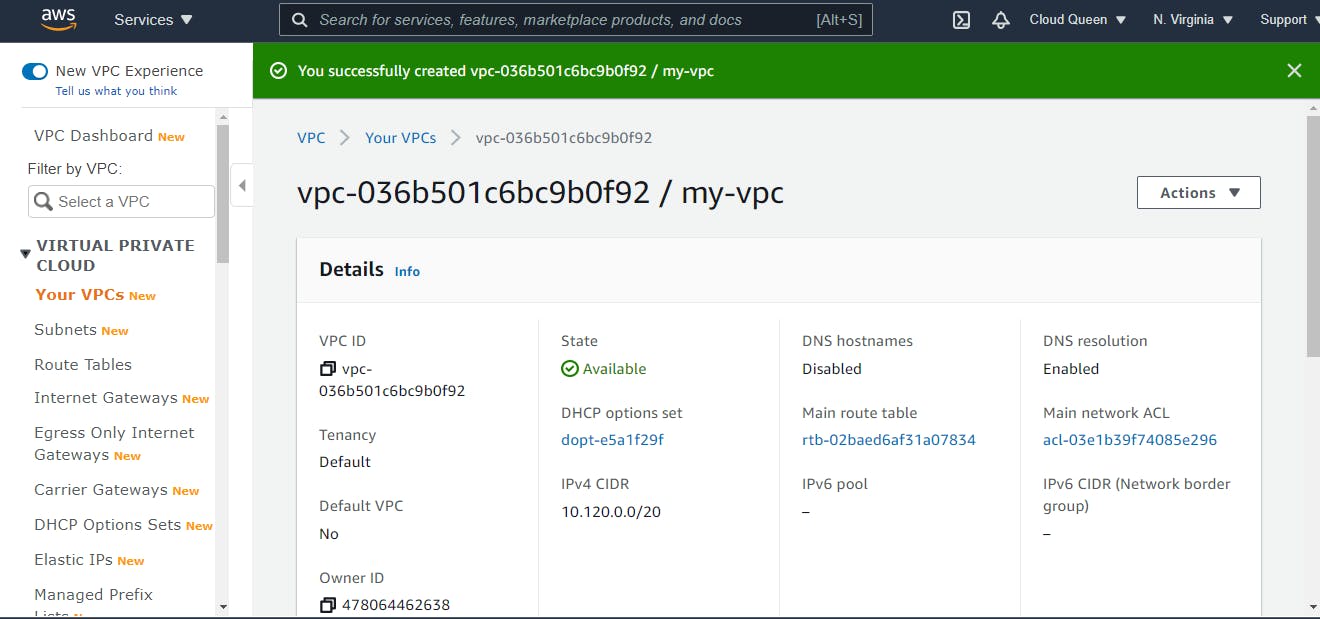
After clicking the button, it displays the VPC Dashboard, showing the VPC has been created successfully and it shows extensive details of the newly created VPC network.
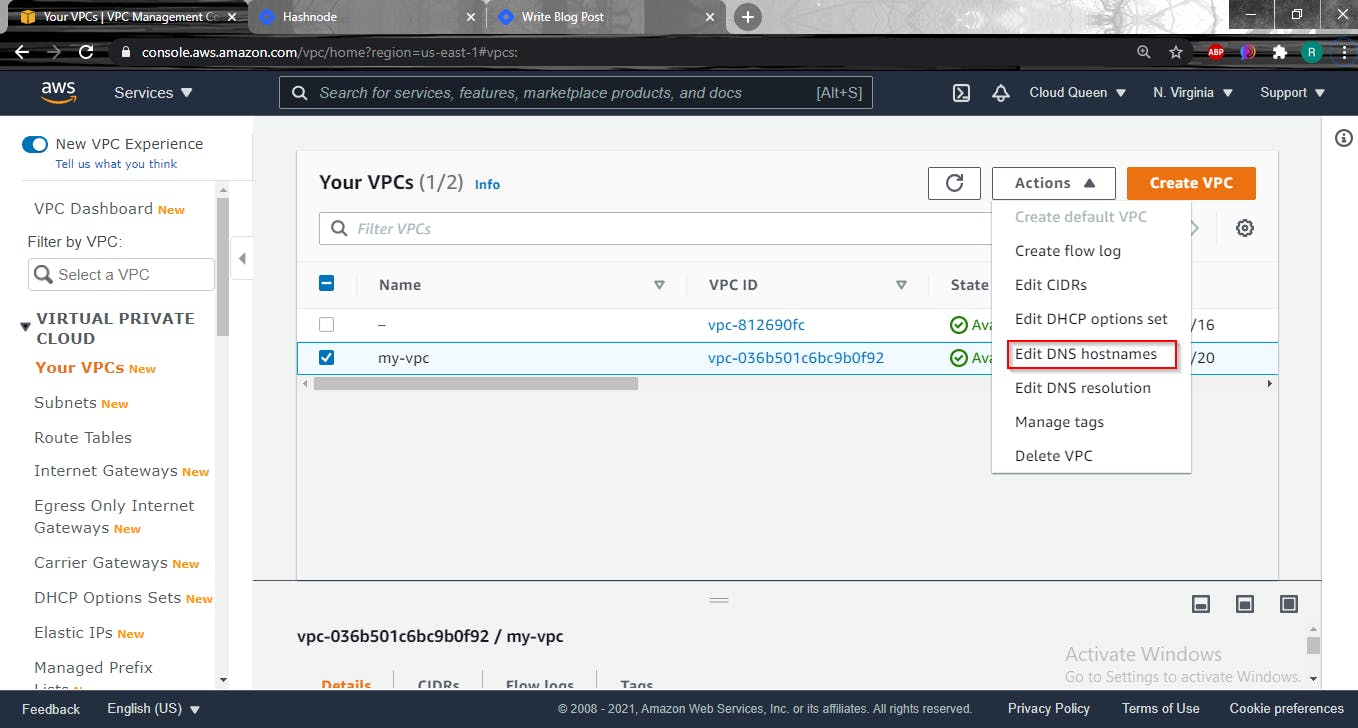
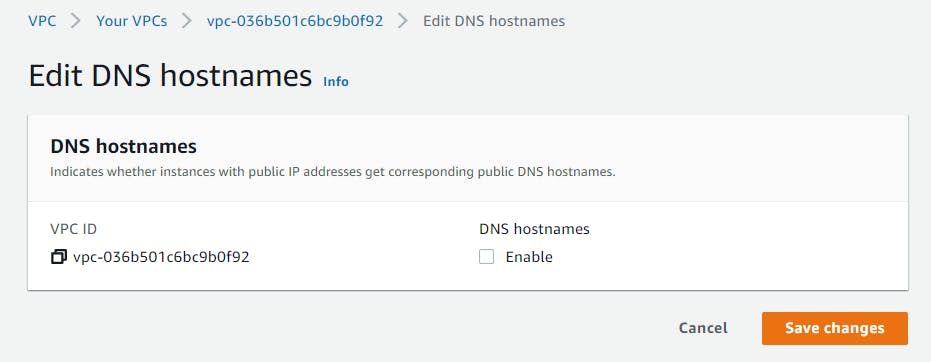
Check the my-vpc box, select the Actions dropdown, select Edit DNS Hostnames.
Check the Enable DNS hostnames box, then Save changes.
Create Public and Private Subnets
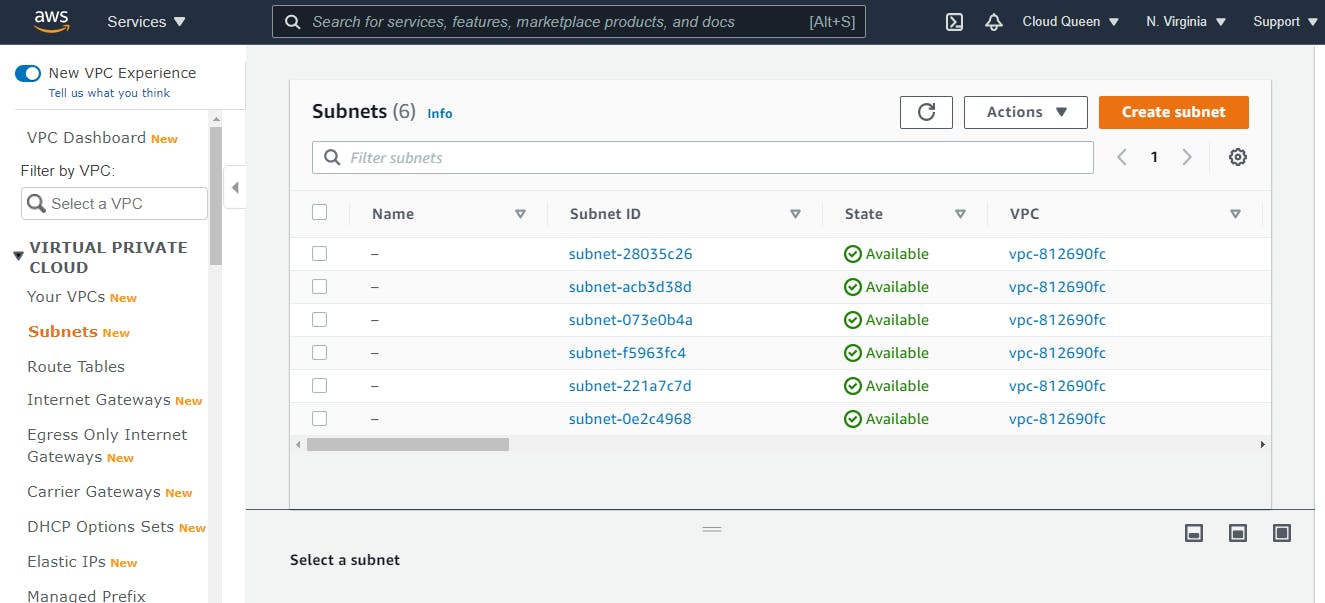
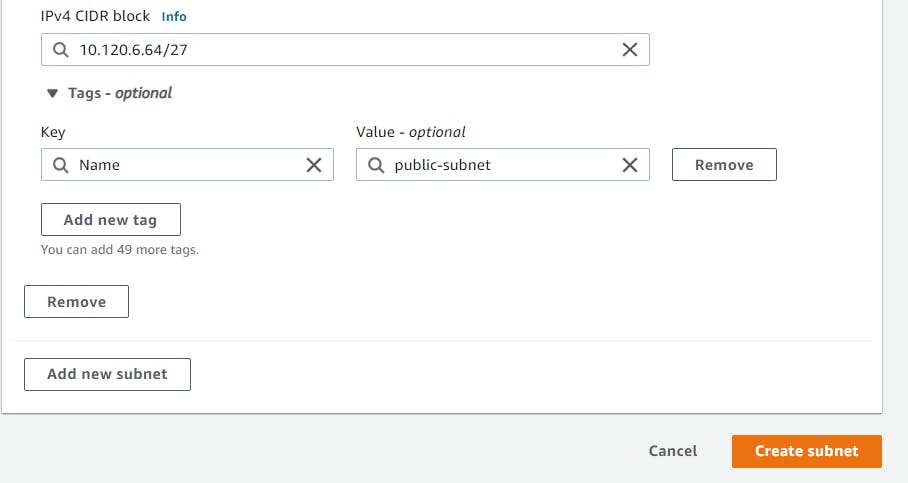
For the purpose of this demonstration, I will be using 10.120.6.64/27 IPv4 CIDR block for the public subnet while the private subnet will take on 10.120.6.128/27. On the VPC Dashboard, select Subnets on the left-hand side of the screen, then select Create Subnet.
On Create subnet page, select VPC ID, which should be the recently created VPC network that is my-vpc.
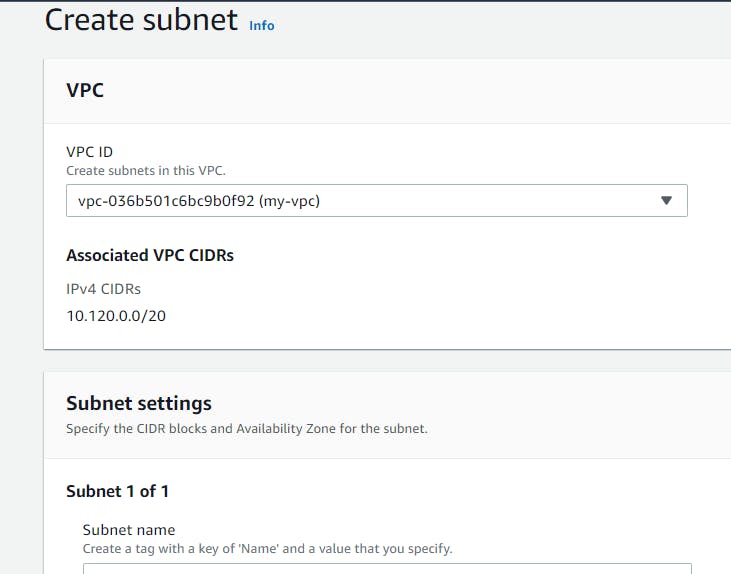
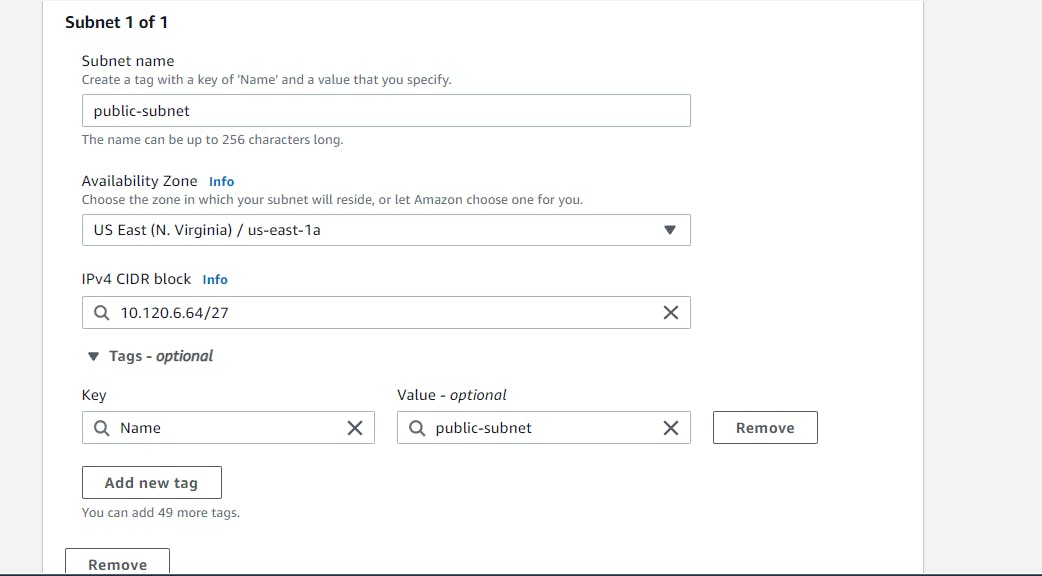
Enter a subnet name, I will be creating a public subnet first so I'll just name it public-subnet, choose the availability zone closest to you, US East (N. Virginia) / us-east-1a, enter 10.120.6.64/27 as the IPv4 CIDR block, leave the rest as default and select Create Subnet.
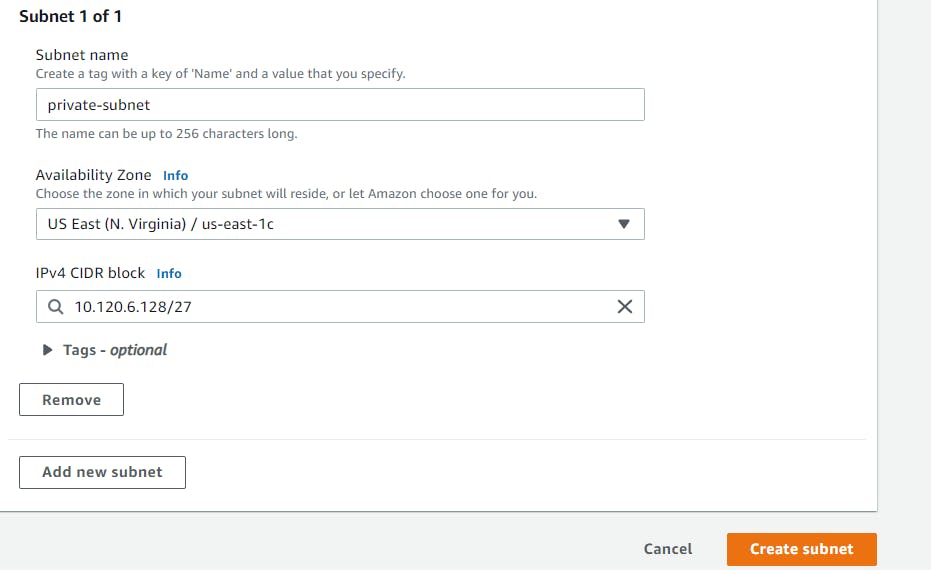
After successfully creating the public subnet, repeat the previous steps to create a private-subnet. Select a different availability zone, will be choosing US East (N. Virginia) / us-east-1c and a different IPv4 CIDR block that is 10.120.6.128/27, then click Create Subnet.
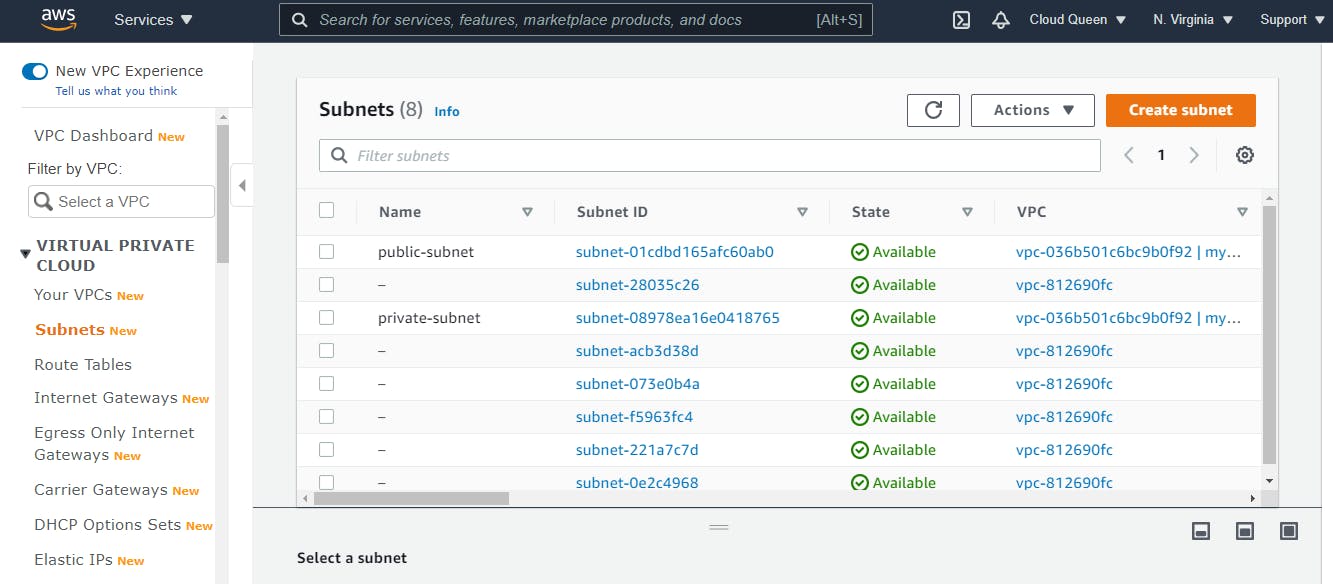
Now, we have successfully created a public and private subnet, let's check if they are available on the VPC Dashboard (Subnets summary).
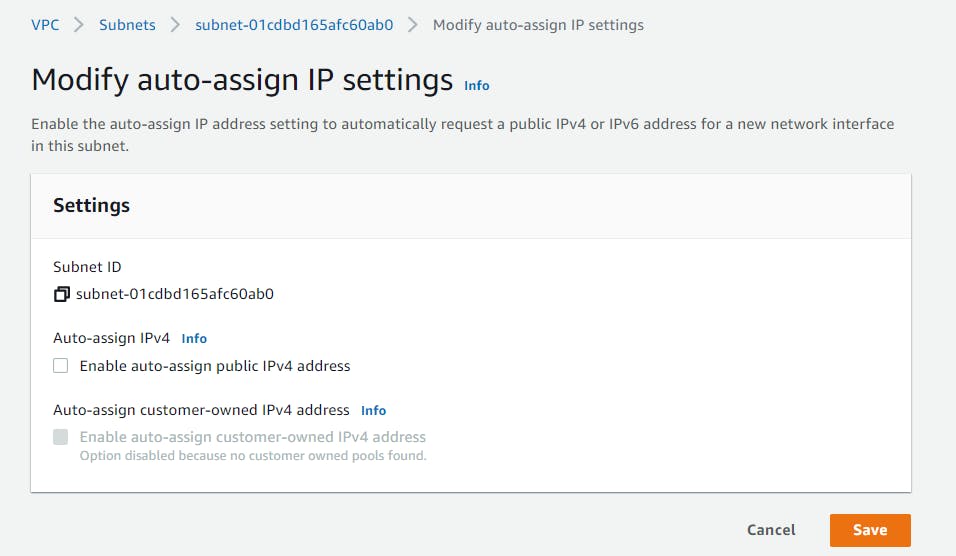
Select the public-subnet box, click on Actions > Modify auto-assign-IP settings
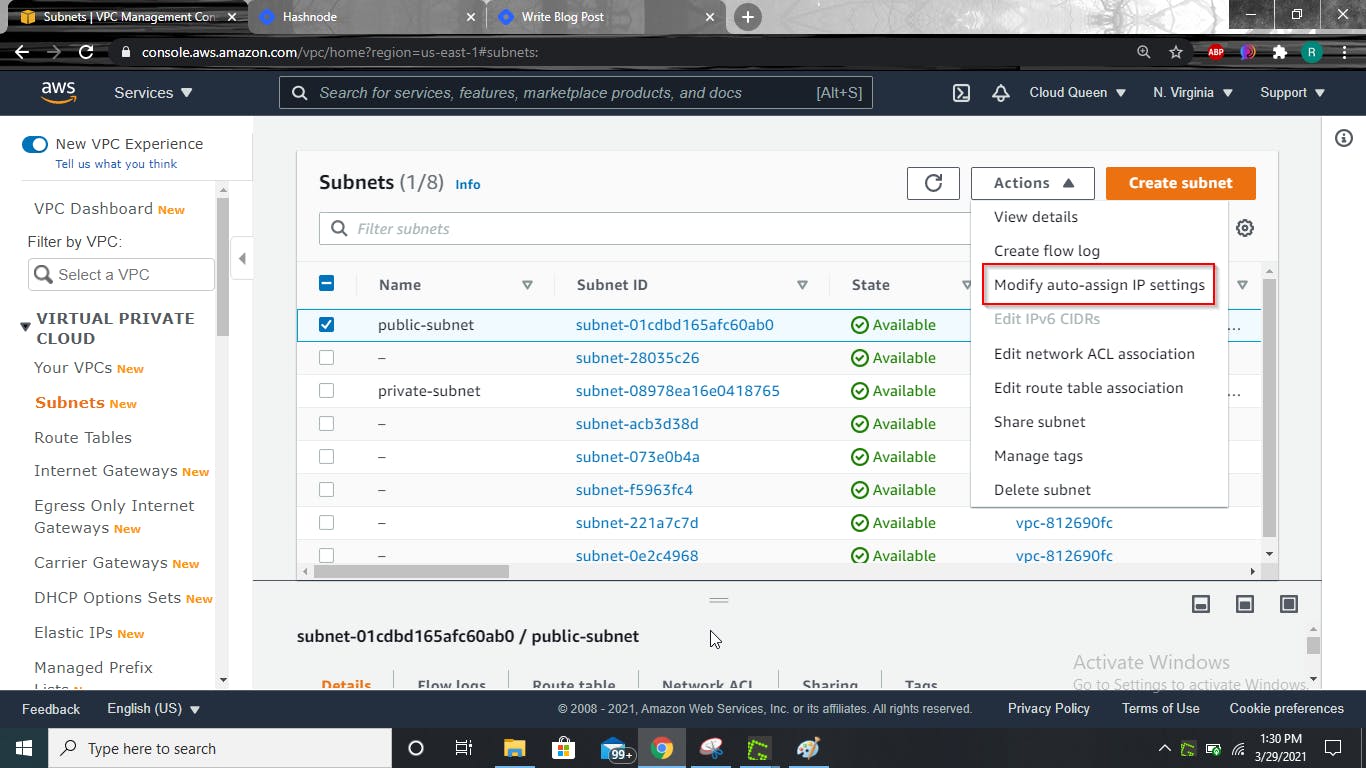
Check the Enable auto-assign public IPv4 address box, then Save
Create Internet Gateway
We will create an internet gateway that will be used by a VPC, it is a logical connection between a VPC and the internet. In other words, it is used by the VPC to access the internet. Only one internet gateway can be attached to a VPC.
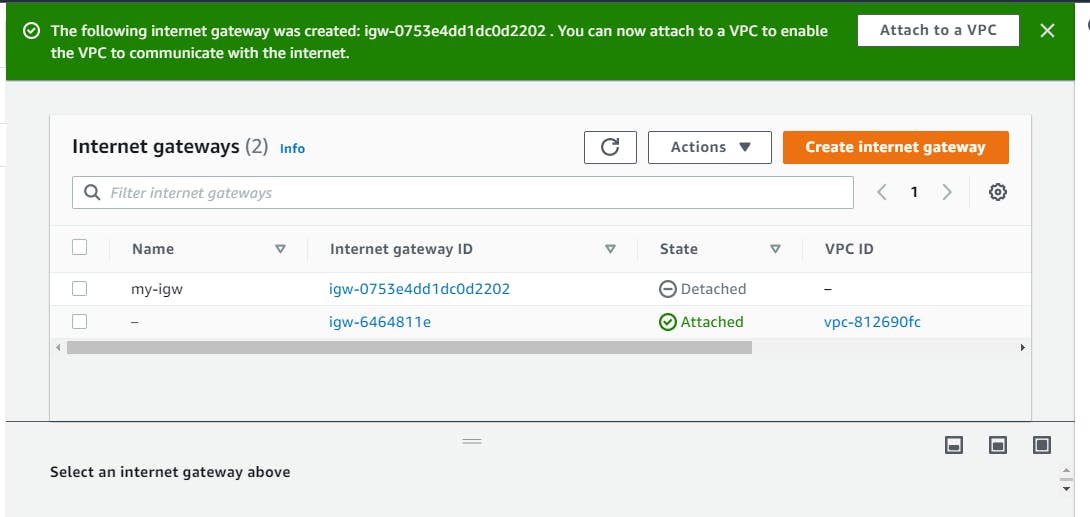
On the VPC Dashboard, click on Internet Gateways on the left side of the screen and select Create internet gateway button.
Create a name-tag , then select Create internet gateway.

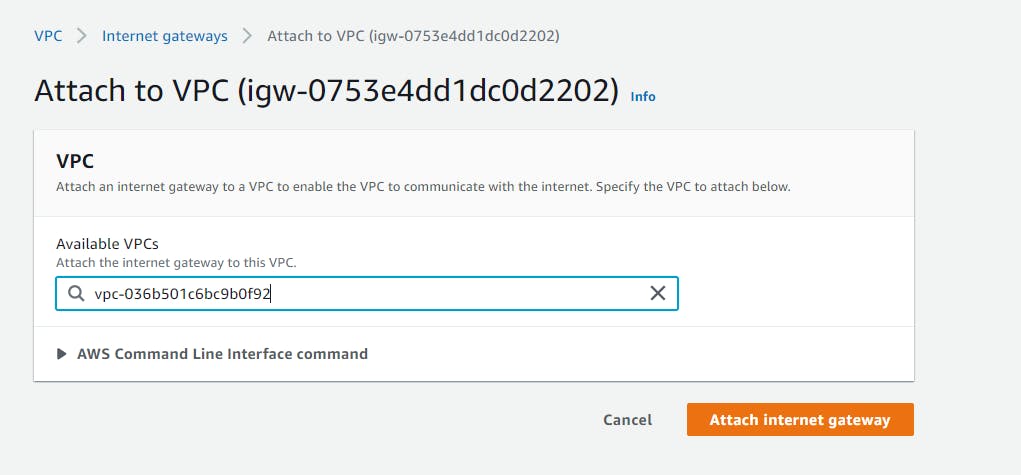
We need to attach the created internet gateway to a VPC.
Select Attach to a VPC, select my-vpc and click on Attach internet gateway
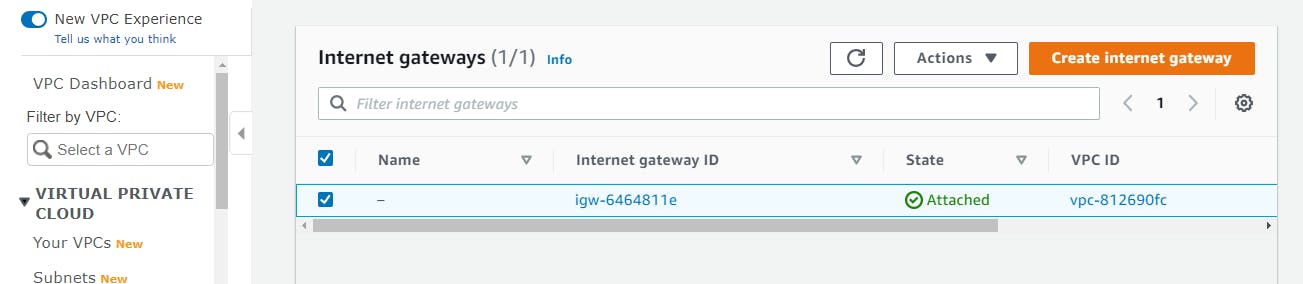
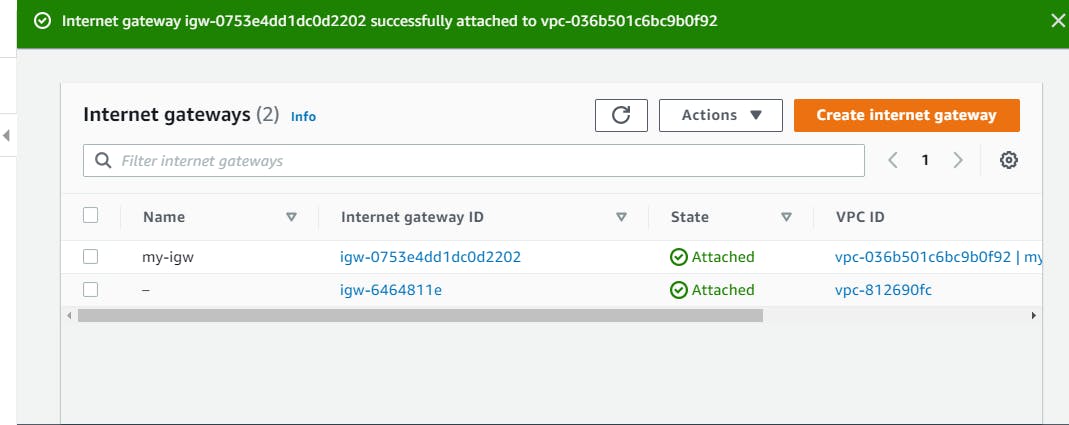
Check on the VPC Dashboard if we have successfully attached the internet gateway to my-vpc.
Create Route Tables for the Subnets
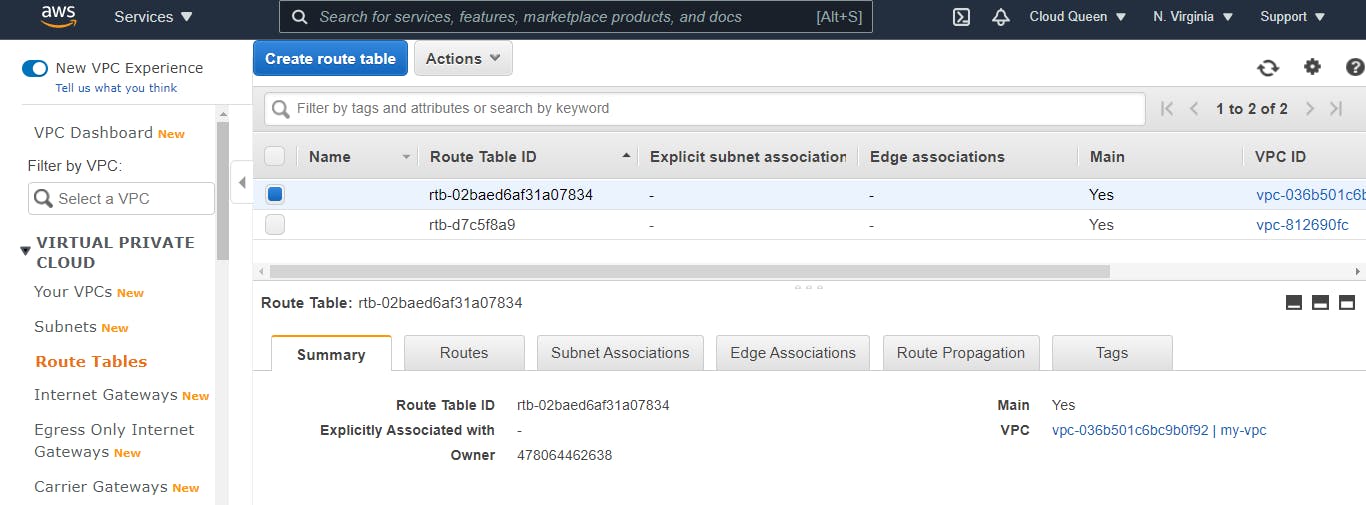
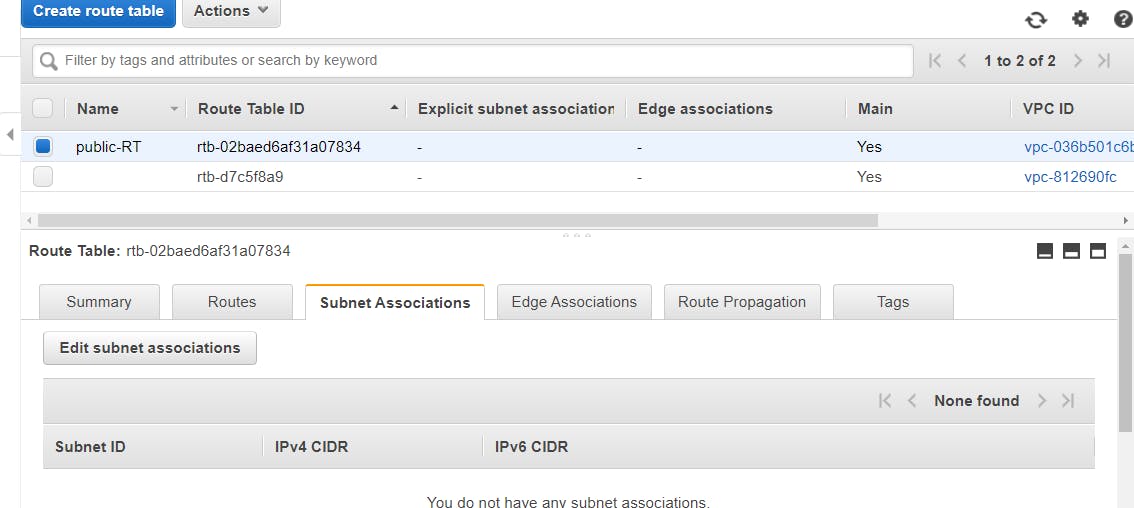
On VPC Dashboard, to the left of the screen, select Route Tables. It displays a list of route tables created. Please note that for every VPC created, a route table is created by default. since we have two VPC networks in this AWS account, therefore two route tables have been created by default. Now we have to identify which of the route table is for the VPC we created i.e my-vpc. select one of the route table boxes. Details of the route table selected are shown below the list of the route tables and let's check if the selected route table is assigned to my-vpc.
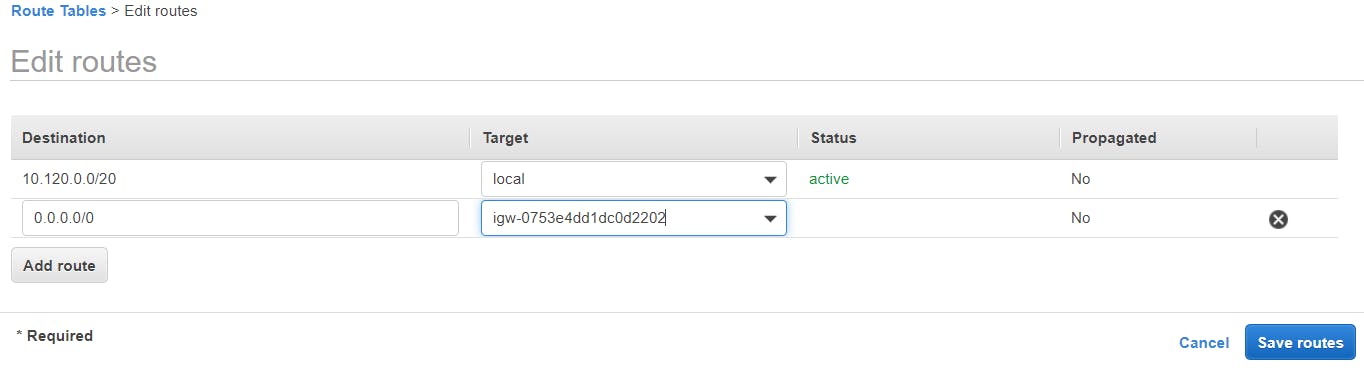
 We can see that the first route table on the list is associated with my-vpc. Now let's name that route table public-RT then attach it to the internet gateway. Under Routes tab, click on the Edit routes > add route button.
Destination - 0.0.0.0/0
Target - select Internet gateway (it automatically assigns the newly created internet gateway)
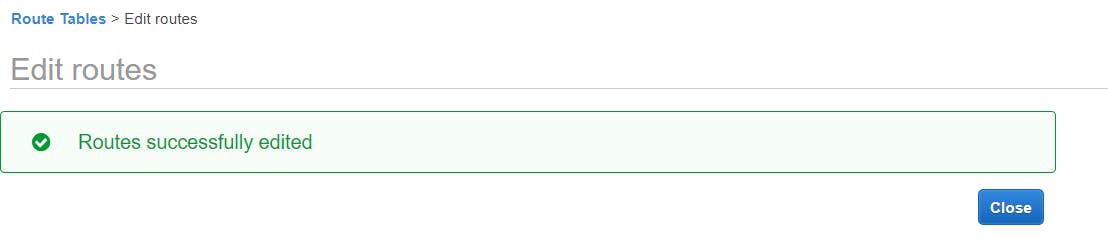
Click Save routes button.
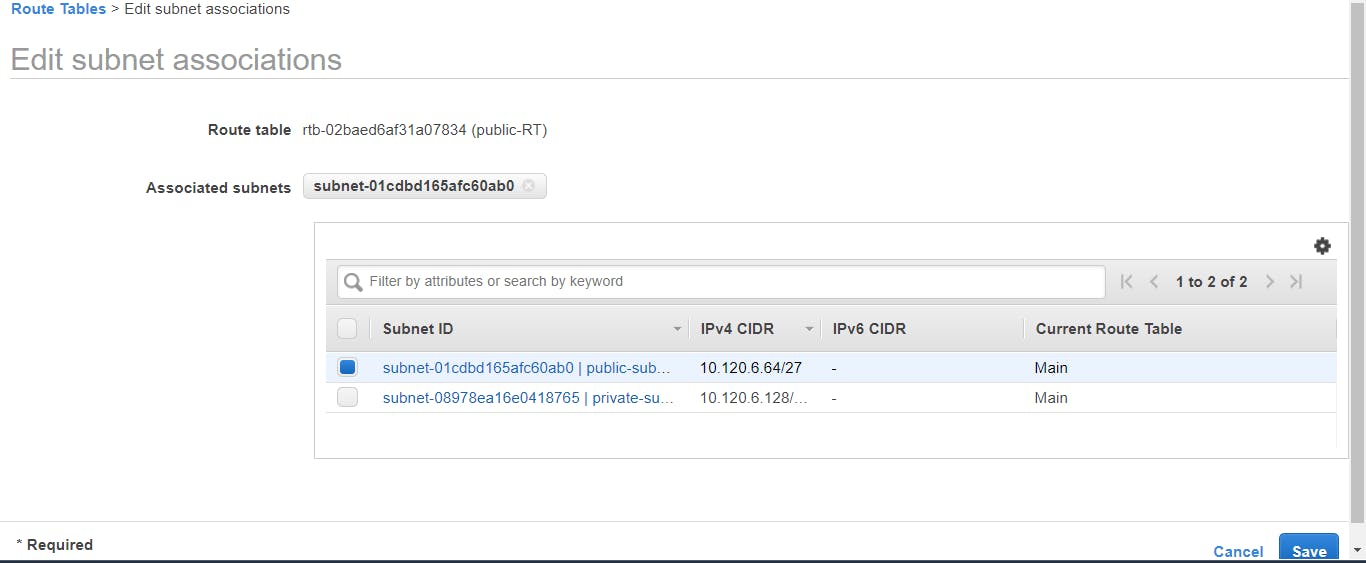
Associate a subnet to the route table, in this case, the public subnet, because we want the public subnet to gain access to the internet using the internet gateway. Go to the Subnet Associations tab, select Edit subnet associations > select public-subnet > Save.
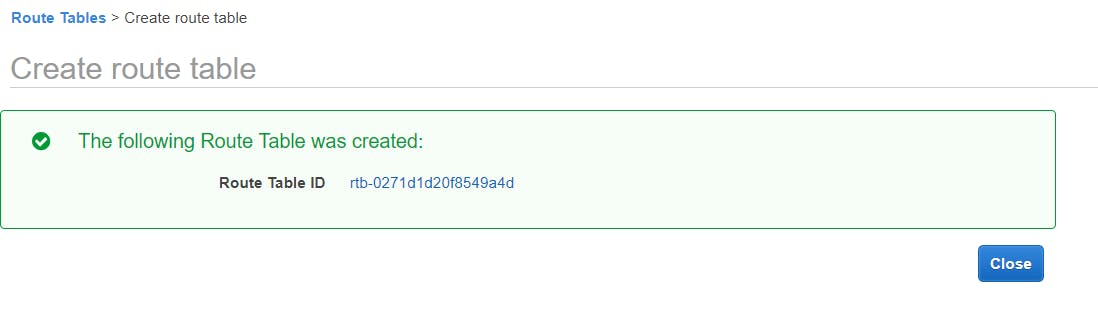
We will be creating another route table, associating it to the private subnet.
Name tag: private-RT
VPC: select VPC related to my-vpc
Click the Create button.

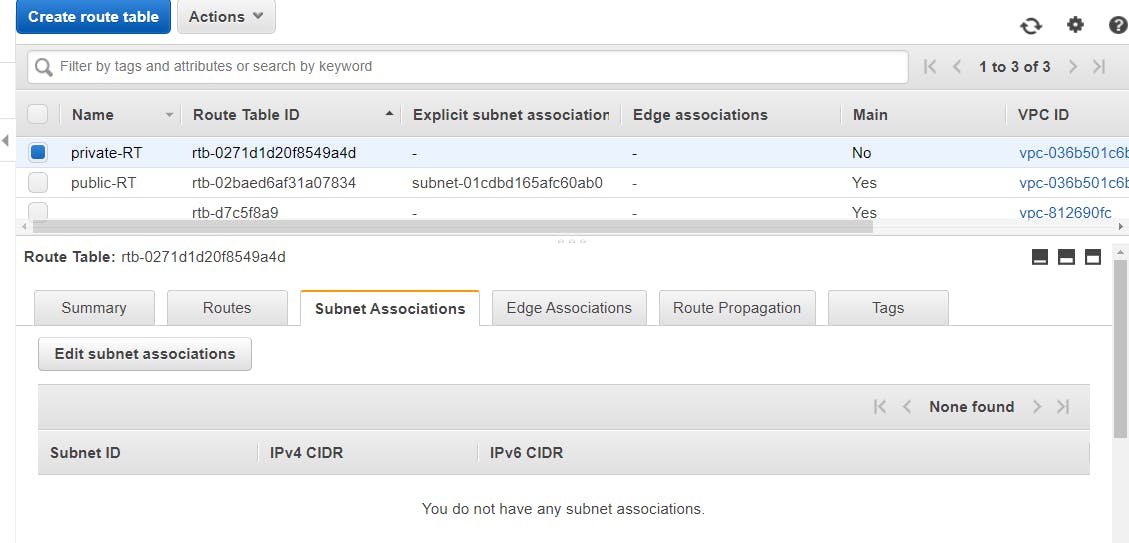
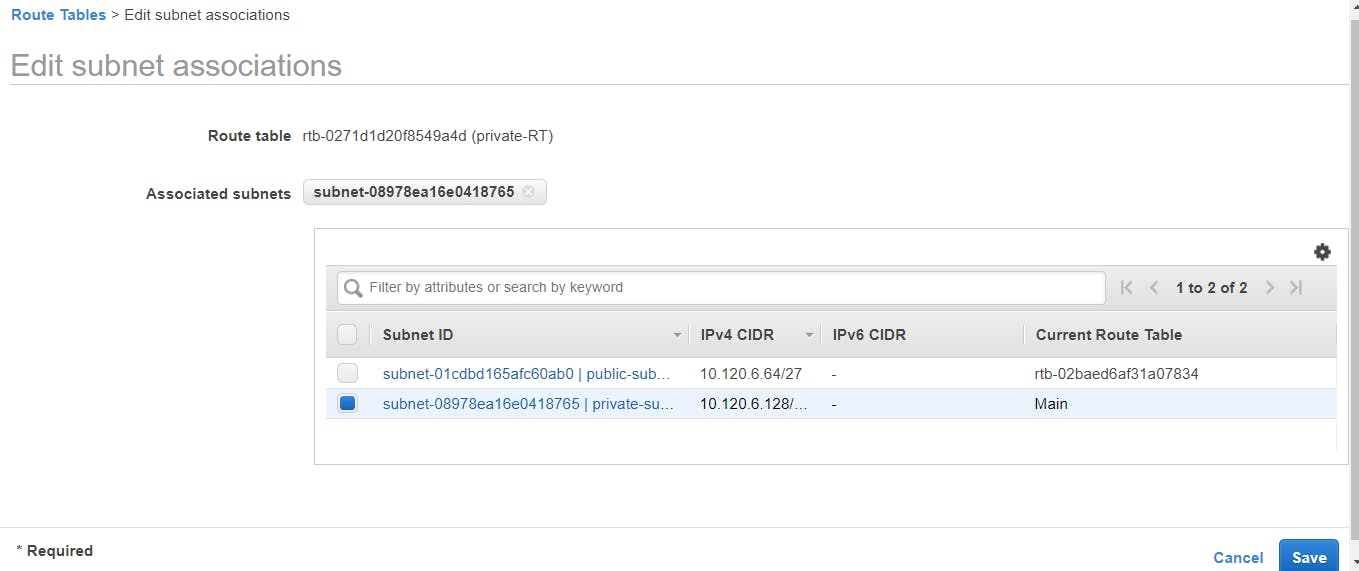
Associate the created route table with the private subnet, click on the private-RT box, it displays details of the route table, go to the Subnet Associations tab, select Edit subnet associations > select the private-subnet > Save.
Create EC2 Instances
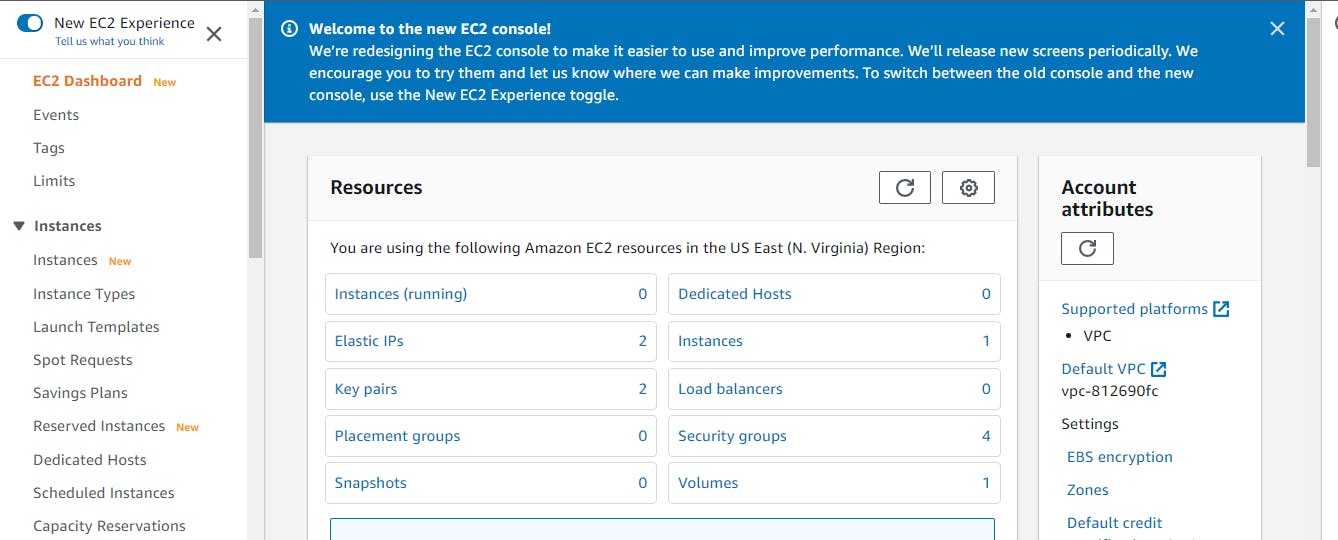
Go to AWS Management Console, under Compute services > EC2. It takes you to the EC2 Dashboard, selects Instances > Launch instances.
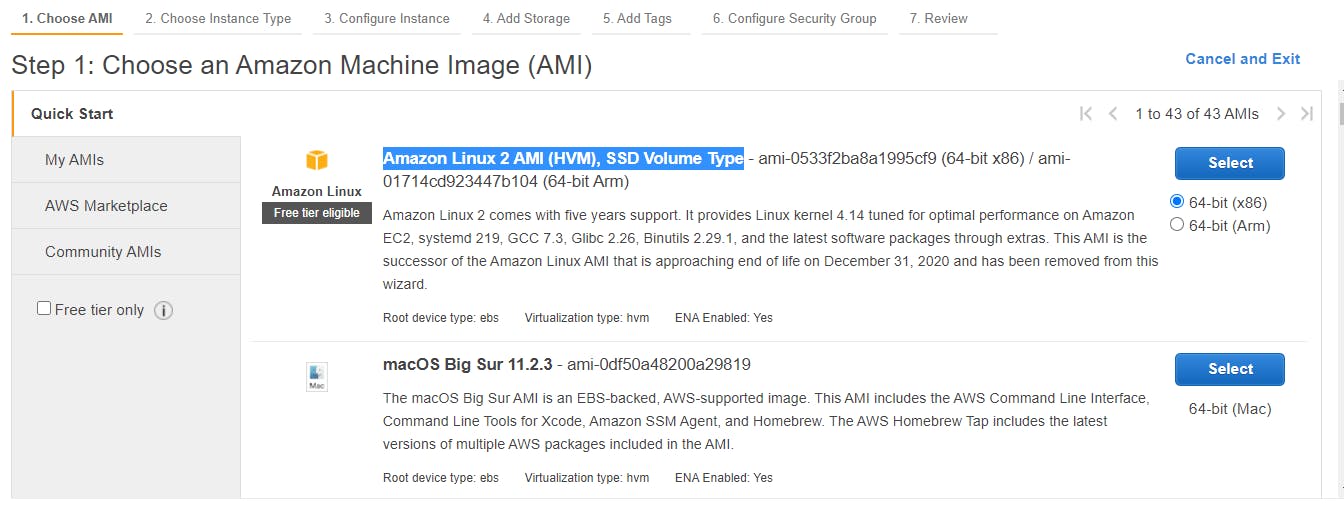
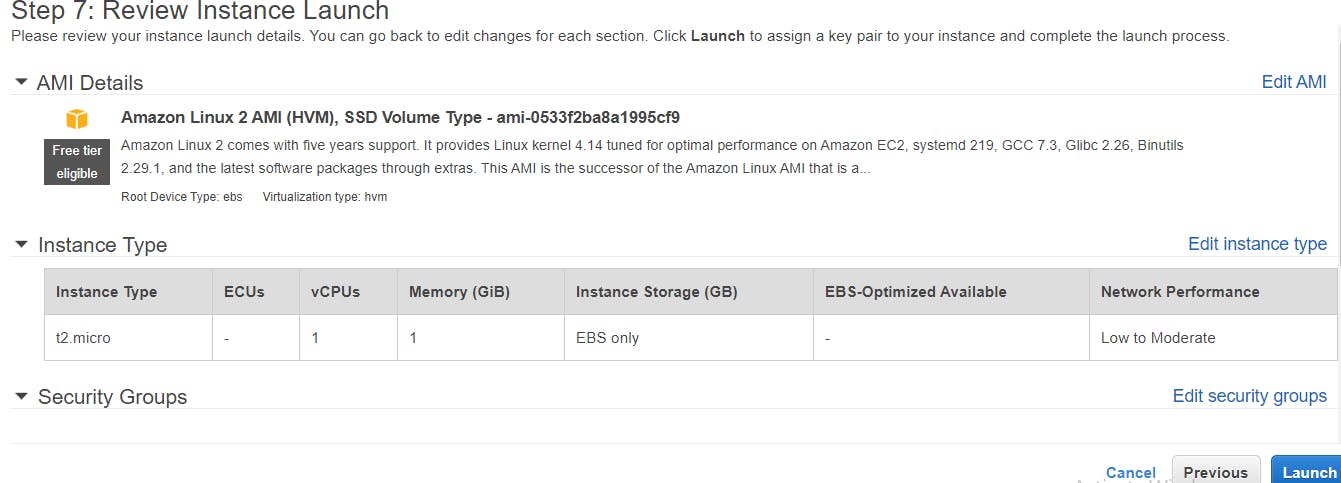
Choose an image, I'll be choosing Amazon Linux 2 AMI (HVM), SSD Volume Type
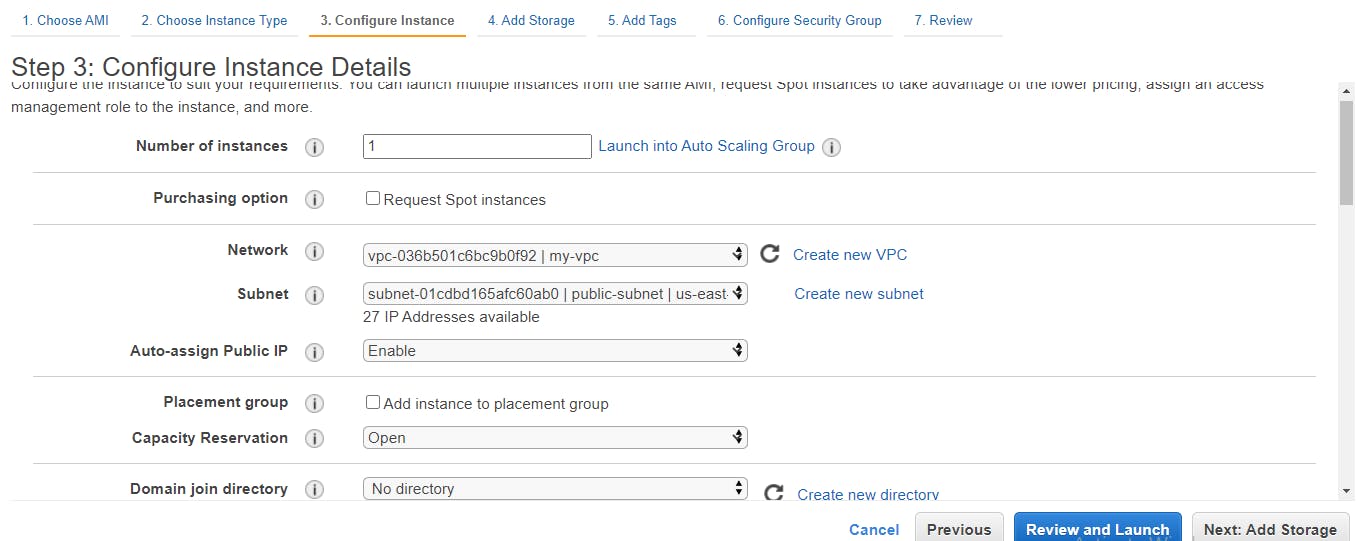
Leave the instance type as the default and configure the instance details:
Network: choose your vpc (my-vpc)
Subnet: select public-subnet
Auto-assign Public IP: Enable
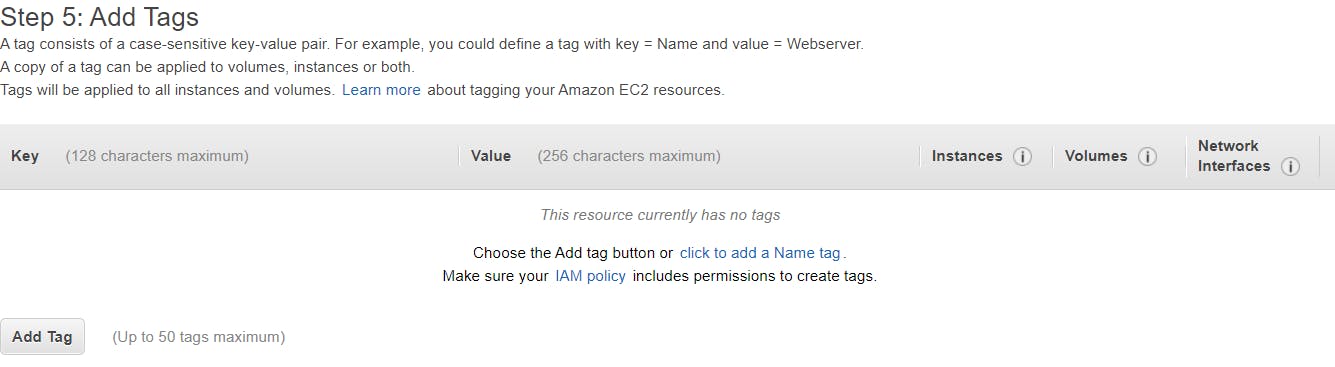
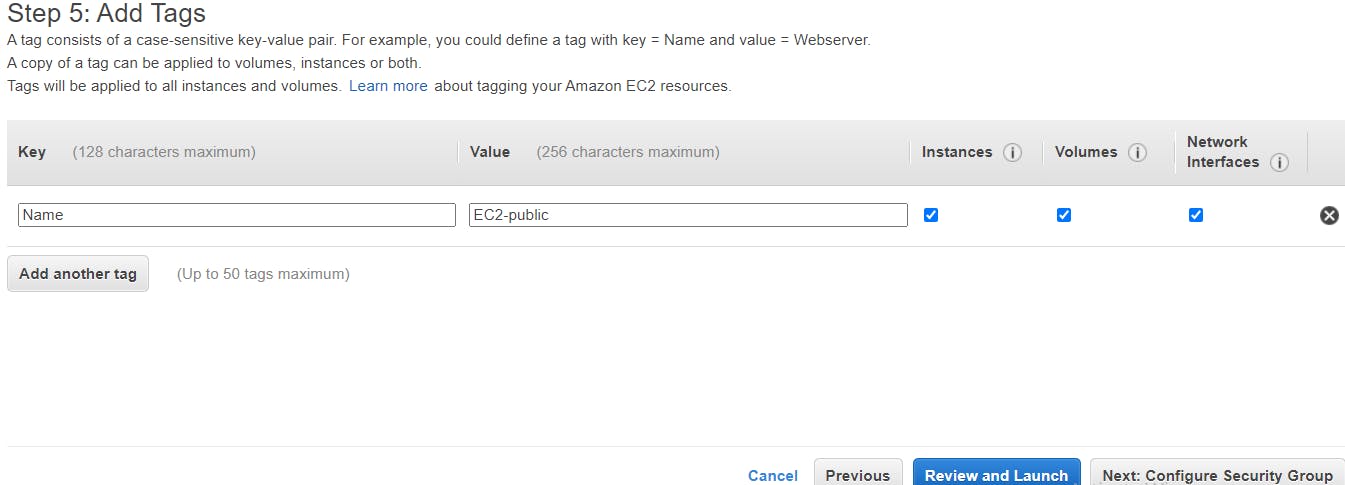
Leave the storage details as the default, under Add Tags, click on the Add Tag button.
Give a name tag to the instance EC2-public
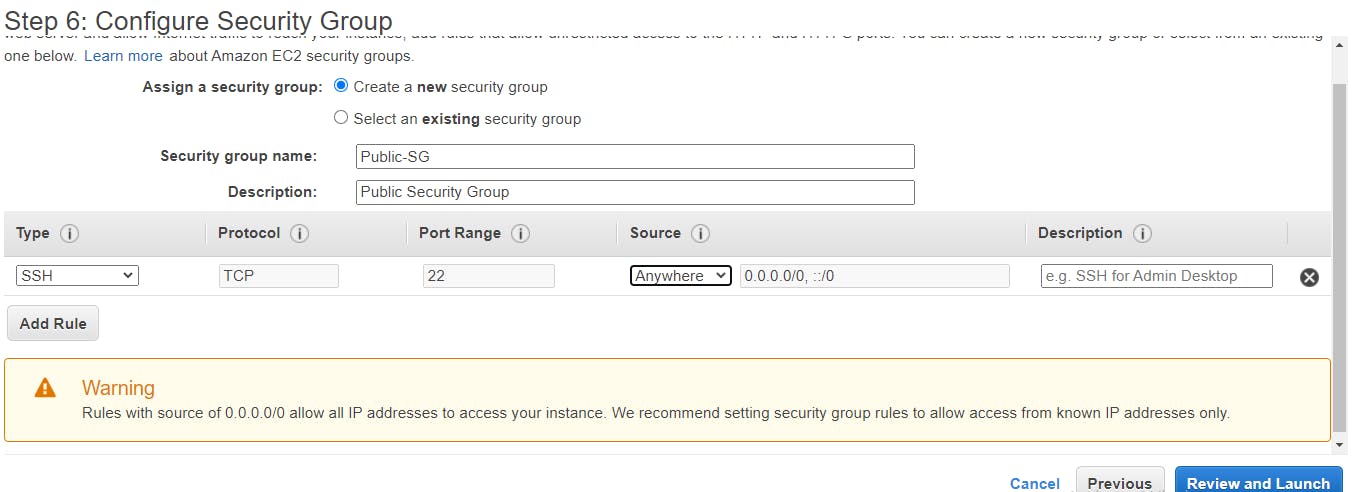
Configure the Security Group, create a new security group and change the security group name to a name of your choice. Add a rule, an SSH port connected to port 22, and choose the source (anywhere) or My IP. Then click on Review and Launch.
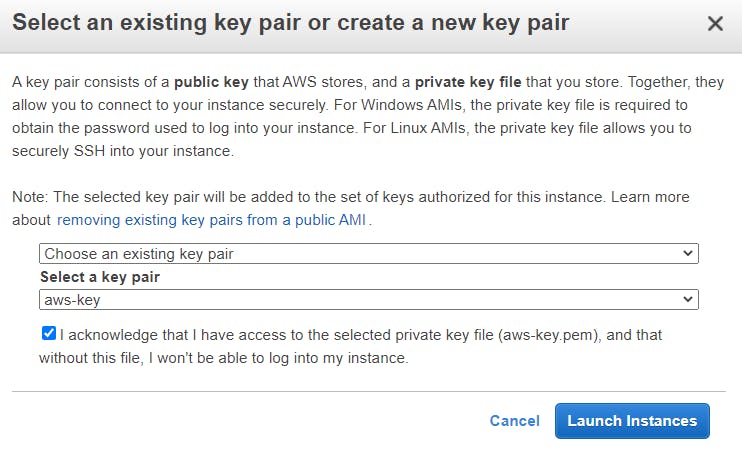
If you do not have a key pair, select Create a new key pair and give the new key pair a name and download to your local machine. Else, select Choose an existing key pair and select the key aws-key.pem, check the box below, and Launch Instances button.
Check launch status to see it is successful, click on View Instances button. Create another instance as above, configure instance details:
Network: choose your vpc (my-vpc)
Subnet: select private-subnet
Auto-assign Public IP: Disable

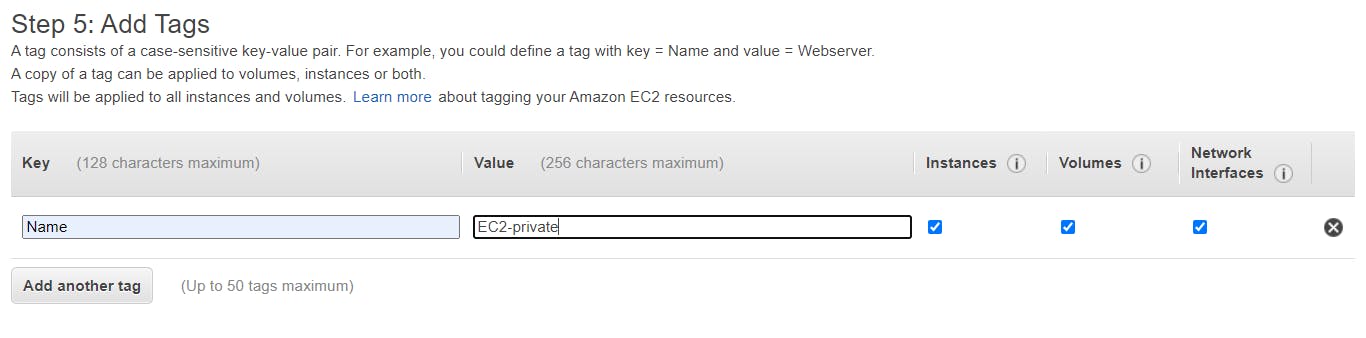
Leave the storage details as the default, under Add Tags, click on the Add Tag button. Give a name-tag to the instance EC2-private.
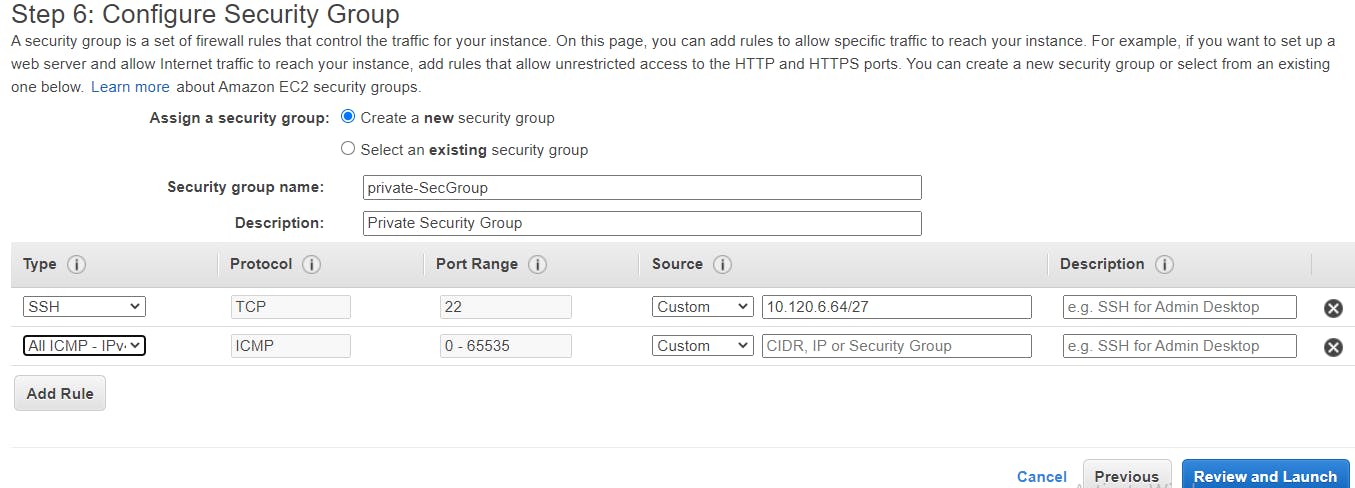
Configure the Security Group, create a new security group and change the security group name to a name of your choice. Add a rule, i.e SSH port connected to port 22, and choose the source custom with the CIDR of the public subnet which is 10.120.6.64/27. Add another rule, All ICMP -IPv4 with the port connected to 0 - 65535 range and the source custom with the same public subnet CIDR , then click on Review and Launch.
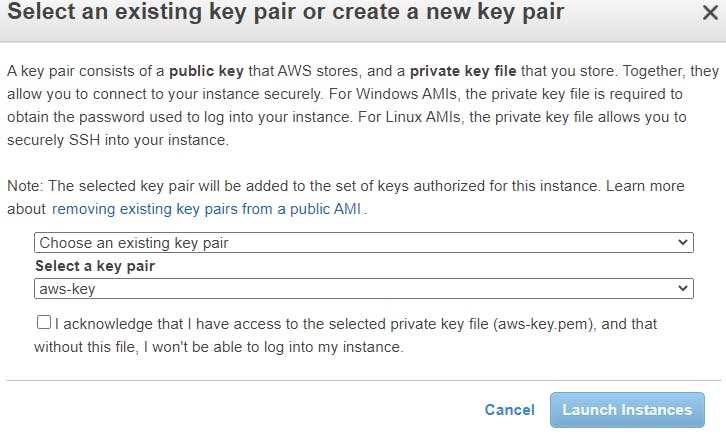
Choosing an existing key pair and select the key pair from the list of available key pairs, aws-key.pem. Check the box below and click Launch Instances
Confirm that the two instances created are running.
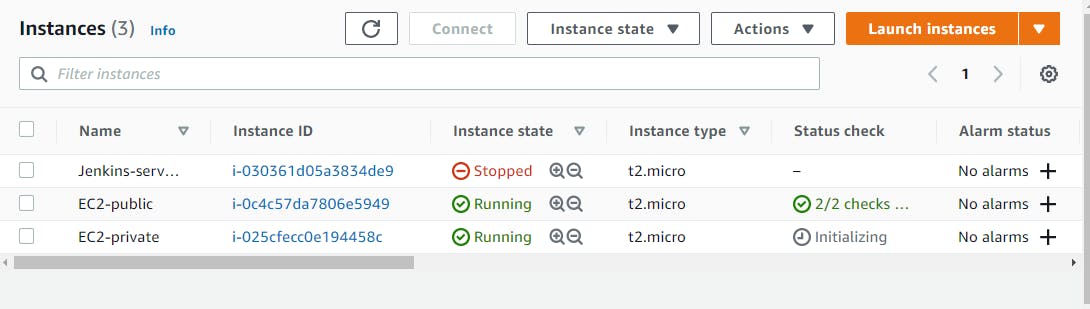
We created two instances and connected one to a public subnet and connected the second instance to a private subnet, now it is time to test the instances we just created.
Test the Instances
Connect to the public instance EC2 public from your local machine using:
ssh -i [directory to aws-key.pem file] ec2-user@public-IP-of-EC2-public-instance
Copy the public IPv4 address of the EC2-public instance 10.120.6.84. Enter the command into the terminal you will get a prompt to continue connecting, enter yes.
user@hostmachine:~$ ssh -i aws-key.pem ec2-user@54.172.244.96
The authenticity of host '54.172.244.96 (54.172.244.96)' can't be established.
ECDSA key fingerprint is SHA256:eF+8Z7VHGELz9TYTKor07/MjwVuYsxXxZ7m+AeNajvI.
Are you sure you want to continue connecting (yes/no)? yes
Warning: Permanently added '54.172.244.96' (ECDSA) to the list of known hosts.
Connection closed by 54.172.244.96 port 22
user@hostmachine:~$
We have successfully been able to connect to the public instance EC2-public, let's repeat the steps above to connect to the private instance EC2-private. We are not supposed to be able to connect to this instance because it does not have a public IP.
cloudqueen@DESKTOP-FIN8BOS:~$ ssh -i aws-key.pem ec2-user@10.120.6.136
No response was gotten from the command above, this means no connection was made. Now let's login to EC2-public instance.
cloudqueen@DESKTOP-FIN8BOS:~$ ssh -i aws-key.pem ec2-user@54.172.244.96

       __|  __|_  )
       _|  (     /   Amazon Linux 2 AMI
      ___|\___|___|

https://aws.amazon.com/amazon-linux-2/
No packages needed for security; 10 packages available
Run "sudo yum update" to apply all updates.
[ec2-user@ip-10-120-6-84 ~]
Run the necessary commands to apply all updates. Let's confirm this instance can access the internet by pinging google.com.
[ec2-user@ip-10-120-6-84 ~]$ ping google.com
PING google.com (172.217.164.174) 56(84) bytes of data.
64 bytes from iad23s69-in-f14.1e100.net (172.217.164.174): icmp_seq=1 ttl=110 time=0.906 ms
64 bytes from iad23s69-in-f14.1e100.net (172.217.164.174): icmp_seq=2 ttl=110 time=1.08 ms
64 bytes from iad23s69-in-f14.1e100.net (172.217.164.174): icmp_seq=3 ttl=110 time=0.981 ms
64 bytes from iad23s69-in-f14.1e100.net (172.217.164.174): icmp_seq=4 ttl=110 time=1.03 ms
64 bytes from iad23s69-in-f14.1e100.net (172.217.164.174): icmp_seq=5 ttl=110 time=1.01 ms
64 bytes from iad23s69-in-f14.1e100.net (172.217.164.174): icmp_seq=6 ttl=110 time=0.957 ms
64 bytes from iad23s69-in-f14.1e100.net (172.217.164.174): icmp_seq=7 ttl=110 time=0.937 ms
64 bytes from iad23s69-in-f14.1e100.net (172.217.164.174): icmp_seq=8 ttl=110 time=0.984 ms
64 bytes from iad23s69-in-f14.1e100.net (172.217.164.174): icmp_seq=9 ttl=110 time=0.963 ms
64 bytes from iad23s69-in-f14.1e100.net (172.217.164.174): icmp_seq=10 ttl=110 time=0.991 ms
.
.
.
From the result above we can see that EC2-instance can successfully access the internet.
Login to the private instance from the public instance
Since we can not connect to the private instance directly, we can try connecting to it from the public instance. Firstly, we will need to copy the private key aws-key.pem into the EC2-public, this will enable us to access the private instance EC2-private. We will create a file to place in the contents of aws-key.pem, we can name it demo.pem. This key will grant us access to connect to the private instance EC2-private from the public instance EC2-public. Open a new terminal and copy the contents of aws-key.pem file and paste in demo.pem file in the EC2-public instance machine and save. Grant permission to the demo.pem file using chmod command.
[ec2-user@ip-10-120-6-84 ~] chmod 400 aws-key.pem
Try to connect to the private instance EC2-private, copy the private IPv4 address then ping the IPv4 address from the EC2-public instance.
[ec2-user@ip-10-120-6-84 ~]$ ping 10.120.6.136
PING 10.120.6.136 (10.120.6.136) 56(84) bytes of data.
64 bytes from 10.120.6.136: icmp_seq=1 ttl=255 time=0.806 ms
64 bytes from 10.120.6.136: icmp_seq=2 ttl=255 time=0.929 ms
64 bytes from 10.120.6.136: icmp_seq=3 ttl=255 time=0.877 ms
64 bytes from 10.120.6.136: icmp_seq=4 ttl=255 time=0.853 ms
64 bytes from 10.120.6.136: icmp_seq=5 ttl=255 time=0.862 ms
64 bytes from 10.120.6.136: icmp_seq=6 ttl=255 time=0.853 ms
64 bytes from 10.120.6.136: icmp_seq=7 ttl=255 time=0.898 ms
.
.
.
We have been able to successfully connect to the private instance through the public instance. Now let's login to the EC2-private through the public instance.
[ec2-user@ip-10-120-6-84 ~]$ ssh -i demo.pem ec2-user@10.120.6.136
The authenticity of host '10.120.6.136 (10.120.6.136)' can't be established.
ECDSA key fingerprint is SHA256:CjScjiUy2IrFAaA3/T9RgTeBL3y1cBT+p8TxDbb7Y1s.
ECDSA key fingerprint is MD5:f4:3c:bb:f0:1e:6b:3a:0e:15:13:34:6d:a4:82:45:7f.
Are you sure you want to continue connecting (yes/no)? yes
Warning: Permanently added '10.120.6.136' (ECDSA) to the list of known hosts.

       __|  __|_  )
       _|  (     /   Amazon Linux 2 AMI
      ___|\___|___|

https://aws.amazon.com/amazon-linux-2/
[ec2-user@ip-10-120-6-136 ~]$
Successfully logged into the private instance, let's try to ping google.com
[ec2-user@ip-10-120-6-136 ~]$ ping google.com
PING google.com (142.250.65.78) 56(84) bytes of data.
^C
--- google.com ping statistics ---
53 packets transmitted, 0 received, 100% packet loss, time 53251ms

[ec2-user@ip-10-120-6-136 ~]$
No response, had to exit out of the process using Ctrl+C. This means this instance cannot access the internet. To enable the private instance to communicate with the internet directly, we will need to set up a NAT gateway.
What is NAT gateway?
NAT means Network Address Translation gateway. According to AMAZON, it is used to enable instances in a private subnet to connect to the internet or other AWS services but prevents the Internet from initiating a connection with those instances.
Sett up NAT gateway
Go to VPC DAshboard and select NAT Gateways on the left-hand side of the screen, then select Create NAT gateway button

On Create NAT gateway page, provide the following details:
Name: nat-gw
subnet: select a public subnet
Elastic IP allocation ID: Choose from the dropdown list
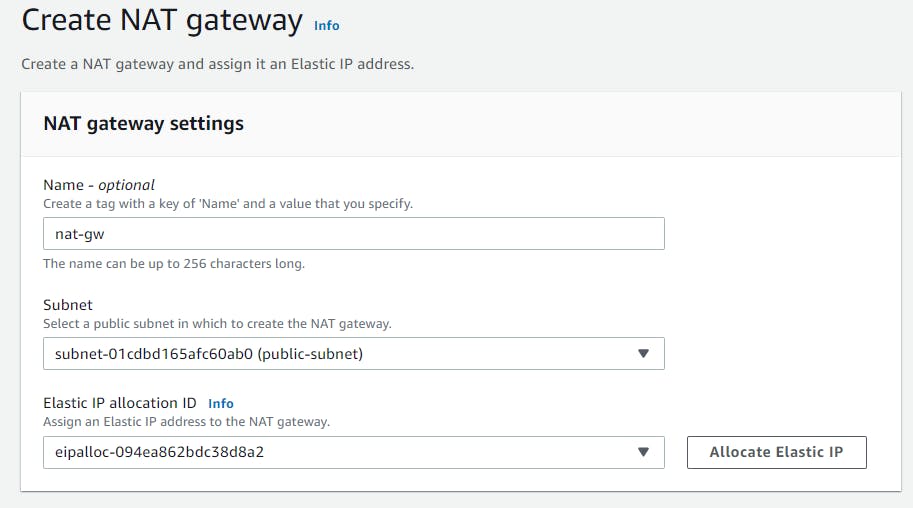
Then click on the Create NAT gateway button.
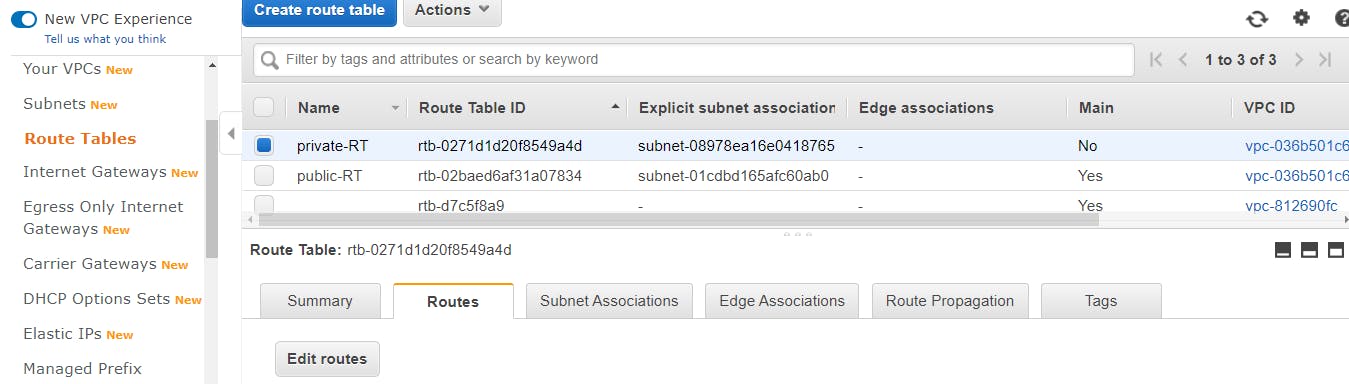
Add NAT gateway to the Route Table
To add the NAT gateway to the private-RT in the route table, check the private-RT box, go to the Routes tab, click on Edit Routes
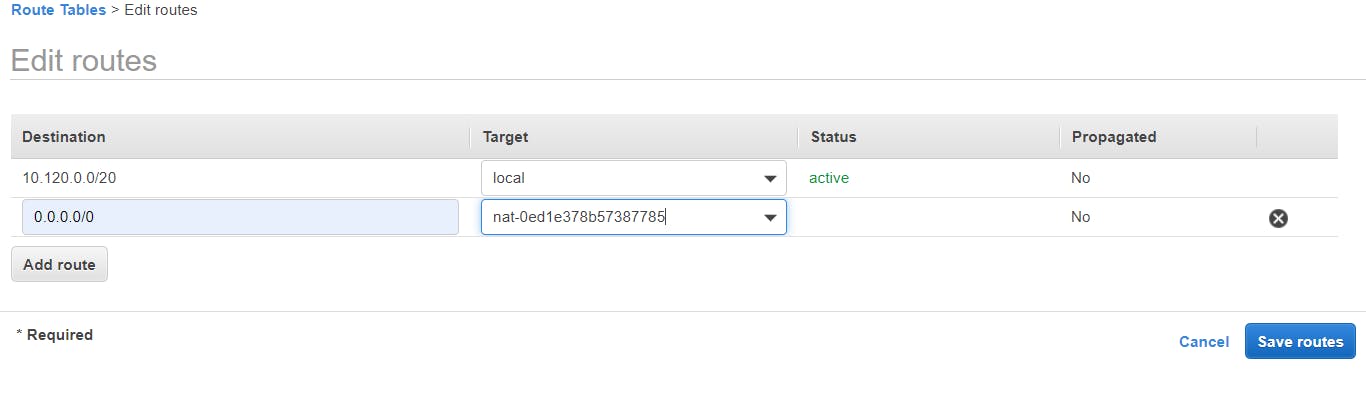
On Edit Routes page:
Destination - 0.0.0.0/0
Target - select NAT gateway, it will automatically assign a NAT ID
Click on Save Routes button.
Now let's try to ping google.com from the terminal.
[ec2-user@ip-10-120-6-136 ~]$ ping google.com
PING google.com (172.217.7.142) 56(84) bytes of data.
64 bytes from iad30s08-in-f14.1e100.net (172.217.7.142): icmp_seq=1 ttl=51 time=1.83 ms
64 bytes from iad30s08-in-f14.1e100.net (172.217.7.142): icmp_seq=2 ttl=51 time=1.37 ms
64 bytes from iad30s08-in-f14.1e100.net (172.217.7.142): icmp_seq=3 ttl=51 time=5.58 ms
64 bytes from iad30s08-in-f14.1e100.net (172.217.7.142): icmp_seq=4 ttl=51 time=1.25 ms
64 bytes from iad30s08-in-f14.1e100.net (172.217.7.142): icmp_seq=5 ttl=51 time=1.83 ms
64 bytes from iad30s08-in-f14.1e100.net (172.217.7.142): icmp_seq=6 ttl=51 time=1.26 ms
64 bytes from iad30s08-in-f14.1e100.net (172.217.7.142): icmp_seq=7 ttl=51 time=1.24 ms
64 bytes from iad30s08-in-f14.1e100.net (172.217.7.142): icmp_seq=8 ttl=51 time=1.27 ms
64 bytes from iad30s08-in-f14.1e100.net (172.217.7.142): icmp_seq=9 ttl=51 time=1.23 ms
64 bytes from iad30s08-in-f14.1e100.net (172.217.7.142): icmp_seq=10 ttl=51 time=1.23 ms
64 bytes from iad30s08-in-f14.1e100.net (172.217.7.142): icmp_seq=11 ttl=51 time=1.23 ms
64 bytes from iad30s08-in-f14.1e100.net (172.217.7.142): icmp_seq=12 ttl=51 time=1.24 ms
64 bytes from iad30s08-in-f14.1e100.net (172.217.7.142): icmp_seq=13 ttl=51 time=1.23 ms
64 bytes from iad30s08-in-f14.1e100.net (172.217.7.142): icmp_seq=14 ttl=51 time=1.28 ms
^C
--- google.com ping statistics ---
14 packets transmitted, 14 received, 0% packet loss, time 13019ms
rtt min/avg/max/mdev = 1.230/1.652/5.584/1.109 ms
[ec2-user@ip-10-120-6-136 ~]$
We have been able to connect to the internet through the private instance EC2-private.
Conclusion
With the demonstration above I hope you have been able to create:
- A VPC network
- A public and private subnet
- Configure the subnets to gain access to the internet.
Dear readers, please do not hesitate to give feedback, like, comment and share. Thank you :).